When clients ask me about LED screens, the first thing they usually mention is size. The second is brightness. But the most critical factor, the one that actually determines how your screen looks, is pixel pitch.
After working on multiple LED screen installations across retail stores, outdoor billboards, exhibition stands, and corporate environments, I can confidently say:
“Choosing the wrong pixel pitch can completely ruin the visual experience, even if you invest heavily in the screen.”
This guide will help you understand pixel pitch in simple terms, based on real-world experience, so you can choose the right resolution for your LED screens.
What is Pixel Pitch?
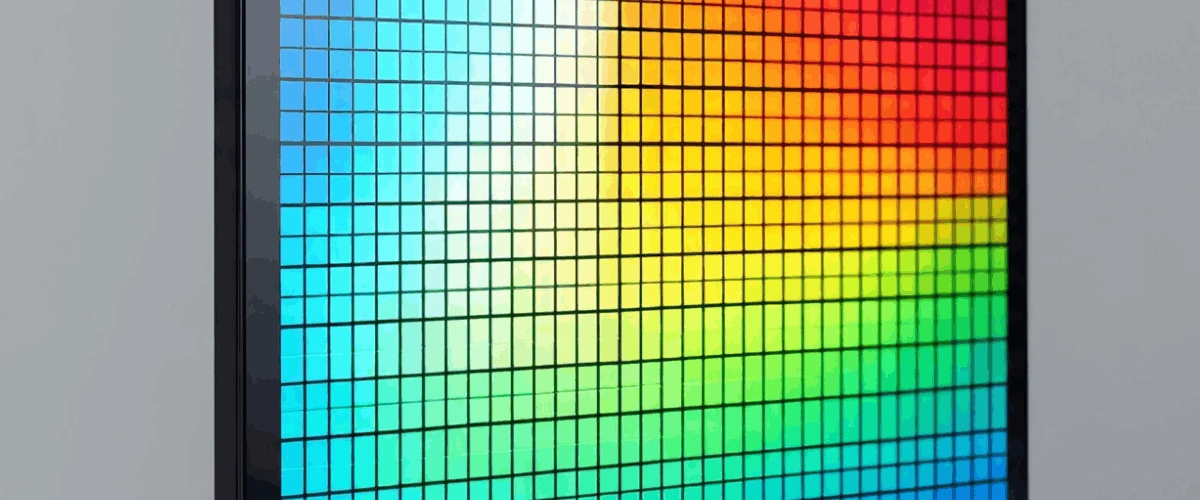
Pixel pitch refers to the distance (in millimeters) between the centers of two adjacent pixels on an LED screen.
For example:
- P2 = 2mm distance between pixels
- P5 = 5mm distance
- P10 = 10mm distance
👉 The smaller the number, the higher the resolution and clarity.
Why Pixel Pitch Matters (Real Experience)
In one indoor retail project, a client installed a P6 screen thinking it would be “good enough.” But the viewing distance was only 2–3 meters.
Result:
- Text looked blurry
- Images were not sharp
- Customers noticed pixelation
We replaced it with a P2.5 screen, and the difference was massive.
“It felt like switching from standard definition to HD.”
This is why pixel pitch is not just a technical term; it directly affects your brand image.
Understanding Resolution in LED Screens
Resolution in LED screens depends on:
- Pixel pitch
- Screen size
Unlike TVs, LED screens are modular. So resolution is not fixed; it is calculated.
Simple Rule:
- Smaller pixel pitch = more pixels per area = higher resolution
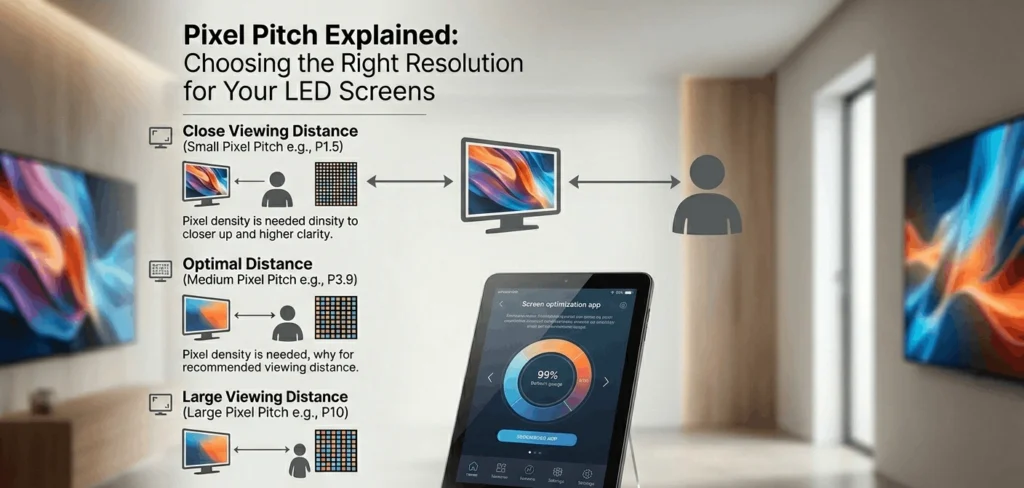
Pixel Pitch vs Viewing Distance (Most Important Rule)
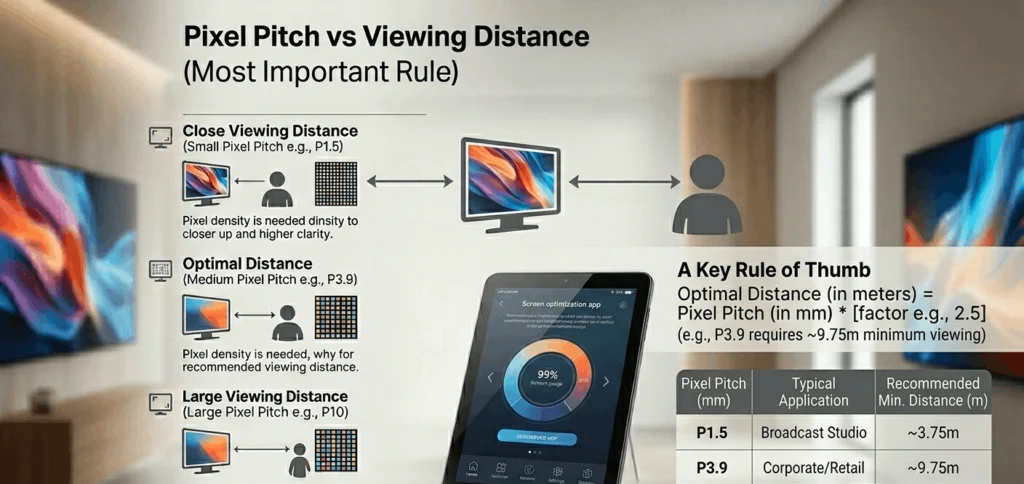
From years of installations, this is the golden rule I always follow:
Minimum Viewing Distance ≈ Pixel Pitch (in mm)
Examples:
- P2 → Best viewing distance = 2 meters
- P5 → Best viewing distance = 5 meters
- P10 → Best viewing distance = 10 meters
Real Example from UAE Market
In a corporate office in Dubai, we installed a large LED wall in a meeting room.
Initial request:
- Large screen with budget constraints
Client selected P4.
Problem:
- People sit very close (1.5–2 meters)
Solution:
- Recommended P2 instead
Result:
- Clear presentations
- Sharp text
- Professional appearance
This small change made a huge difference in usability.
Types of Pixel Pitch (Where to Use Each)
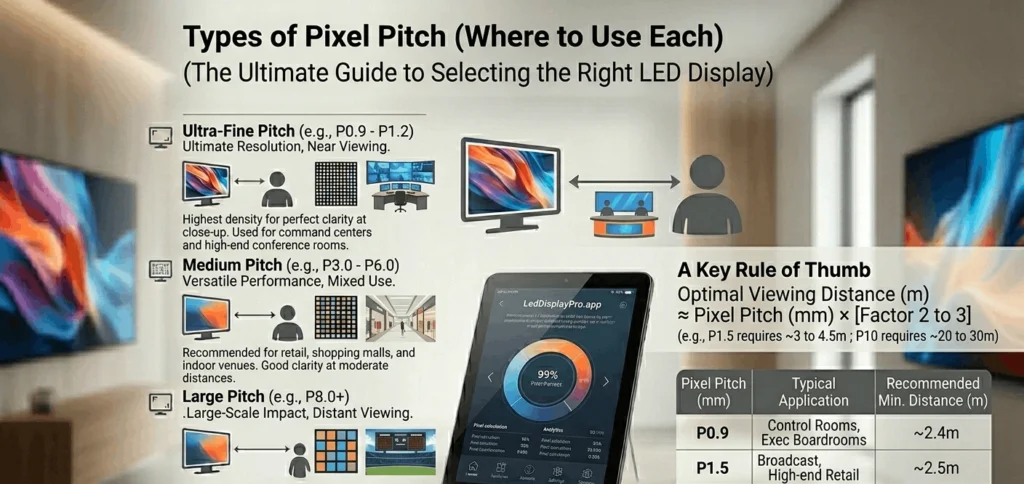
1. Fine Pixel Pitch (P0.9 – P2.5)
Best for:
- Indoor screens
- Boardrooms
- Control rooms
- Retail displays
Experience Insight:
In luxury retail stores, especially in places like Dubai Mall, brands always use fine pixel pitch screens because customers are very close to the display.
2. Medium Pixel Pitch (P3 – P6)
Best for:
- Shopping malls
- Exhibition booths
- Indoor advertising
Real Use Case:
For an exhibition setup in Dubai World Trade Centre, we used P3.9 screens. Visitors were 3–5 meters away, and the visuals looked perfect.
3. Large Pixel Pitch (P8 – P10+)
Best for:
- Outdoor billboards
- Highway advertising
- Large public displays
Experience Insight:
In outdoor advertising across Dubai, most billboards use P10 or higher because viewers are far away.
How to Choose the Right Pixel Pitch
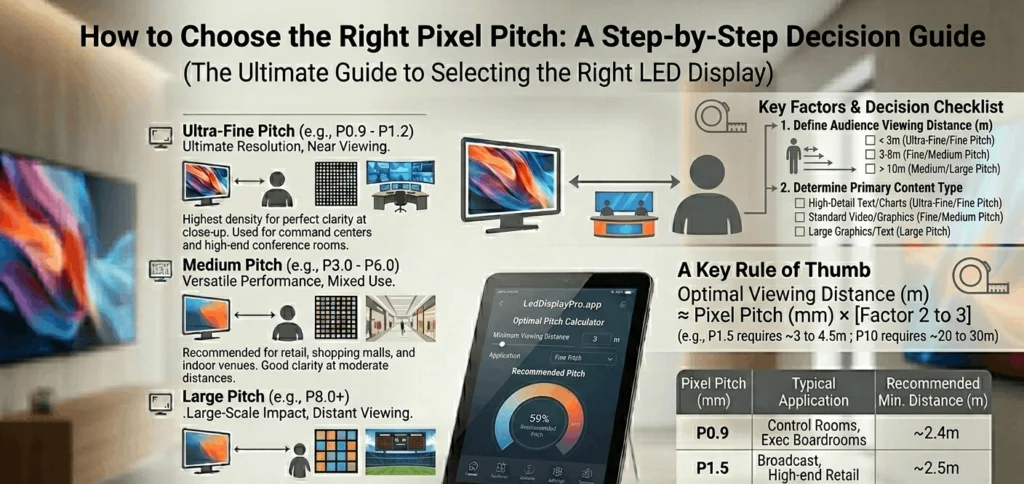
Step 1: Identify Viewing Distance
This is the most important factor.
Ask:
- How close will people stand or sit?
Step 2: Define Screen Purpose
Different uses require different clarity levels:
- Text-heavy content → High resolution (small pitch)
- Video ads → Medium resolution
- Large outdoor visuals → Lower resolution
Step 3: Consider Budget
Smaller pixel pitch = higher cost.
From experience:
- P2 is significantly more expensive than P5
- But using the wrong pitch can cost more in the long run
Step 4: Content Type Matters
If your content includes:
- Small text → Go for P1.5–P2
- Images/videos → P2.5–P4
- Large visuals → P5+
Common Mistakes to Avoid
1. Choosing Based on Price Only
Many clients choose larger pixel pitch to save money.
Result:
- Poor display quality
- Bad user experience
2. Ignoring Viewing Distance
This is the biggest mistake.
I’ve seen projects fail because:
“The screen looked good in specs but bad in real life.”
3. Overpaying for Unnecessary Resolution
Sometimes clients choose P1.2 for large halls where P3 would work perfectly.
This increases cost without real benefit.
Real Project Comparison
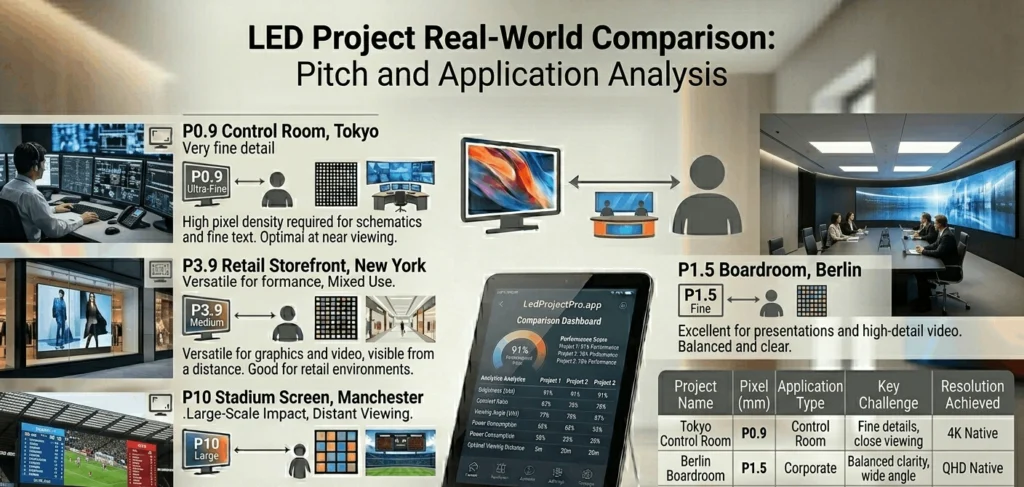
Project 1: Retail Store Display
- Pixel Pitch: P2
- Viewing Distance: 2 meters
- Result: Sharp, premium look
Project 2: Outdoor Billboard
- Pixel Pitch: P10
- Viewing Distance: 20+ meters
- Result: Clear and cost-effective
Project 3: Exhibition Booth
- Pixel Pitch: P3.9
- Viewing Distance: 3–5 meters
- Result: Balanced quality and cost
Pixel Density Explained Simply
Pixel density = number of pixels per square meter.
- P2 → High density
- P10 → Low density
Higher density = better image quality.
Why Businesses in UAE Focus on the Right Pixel Pitch
In competitive markets like:
- Retail
- Real estate
- Events
Visual quality matters a lot.
From my experience working with brands in Abu Dhabi and Dubai:
“A high-quality LED screen directly impacts customer engagement.”
Poor resolution can:
- Reduce attention
- Damage brand perception
Advanced Insight: Indoor vs Outdoor Pixel Pitch
Indoor Screens
- Require high resolution
- Lower brightness
- Close viewing
Outdoor Screens
- Lower resolution acceptable
- High brightness required
- Long viewing distance
Future Trend: Custom Resolution LED Screens
Modern projects now demand tailored solutions.
Instead of standard sizes, businesses prefer:
👉 custom resolution LED screens
This allows:
- Perfect fit for space
- Optimized pixel density
- Better visual performance
From experience, custom solutions always deliver better results compared to standard setups.
Professional Advice (From Experience)
If I had to simplify everything into one rule:
“Always match pixel pitch with viewing distance, not budget.”
Because:
- You can adjust size
- You can adjust content
- But you cannot fix poor resolution after installation